Elden Ring: Led Fort walkthrough
Far to the west of the Altus Plateau, in its depths Mount Gilmer, you will find Fort Laiedd surrounded by fire fanatics. Forts are a fairly common sight throughout the Elden Ring, and while Fort Laiedd isn’t a particularly involved area, it does contain one of the Most challenging enemies in the game.
RELATED: The Elden Ring: How to Enter the Rise of Lane
In this guide, you’ll learn where to get each item in the area, including Prelate’s Crozier’s Inferno hammer and magic fire scorpion Talisman, along with how to defeat the deadly fire Prelate that stands between you and victory.
How to get to Led Castle
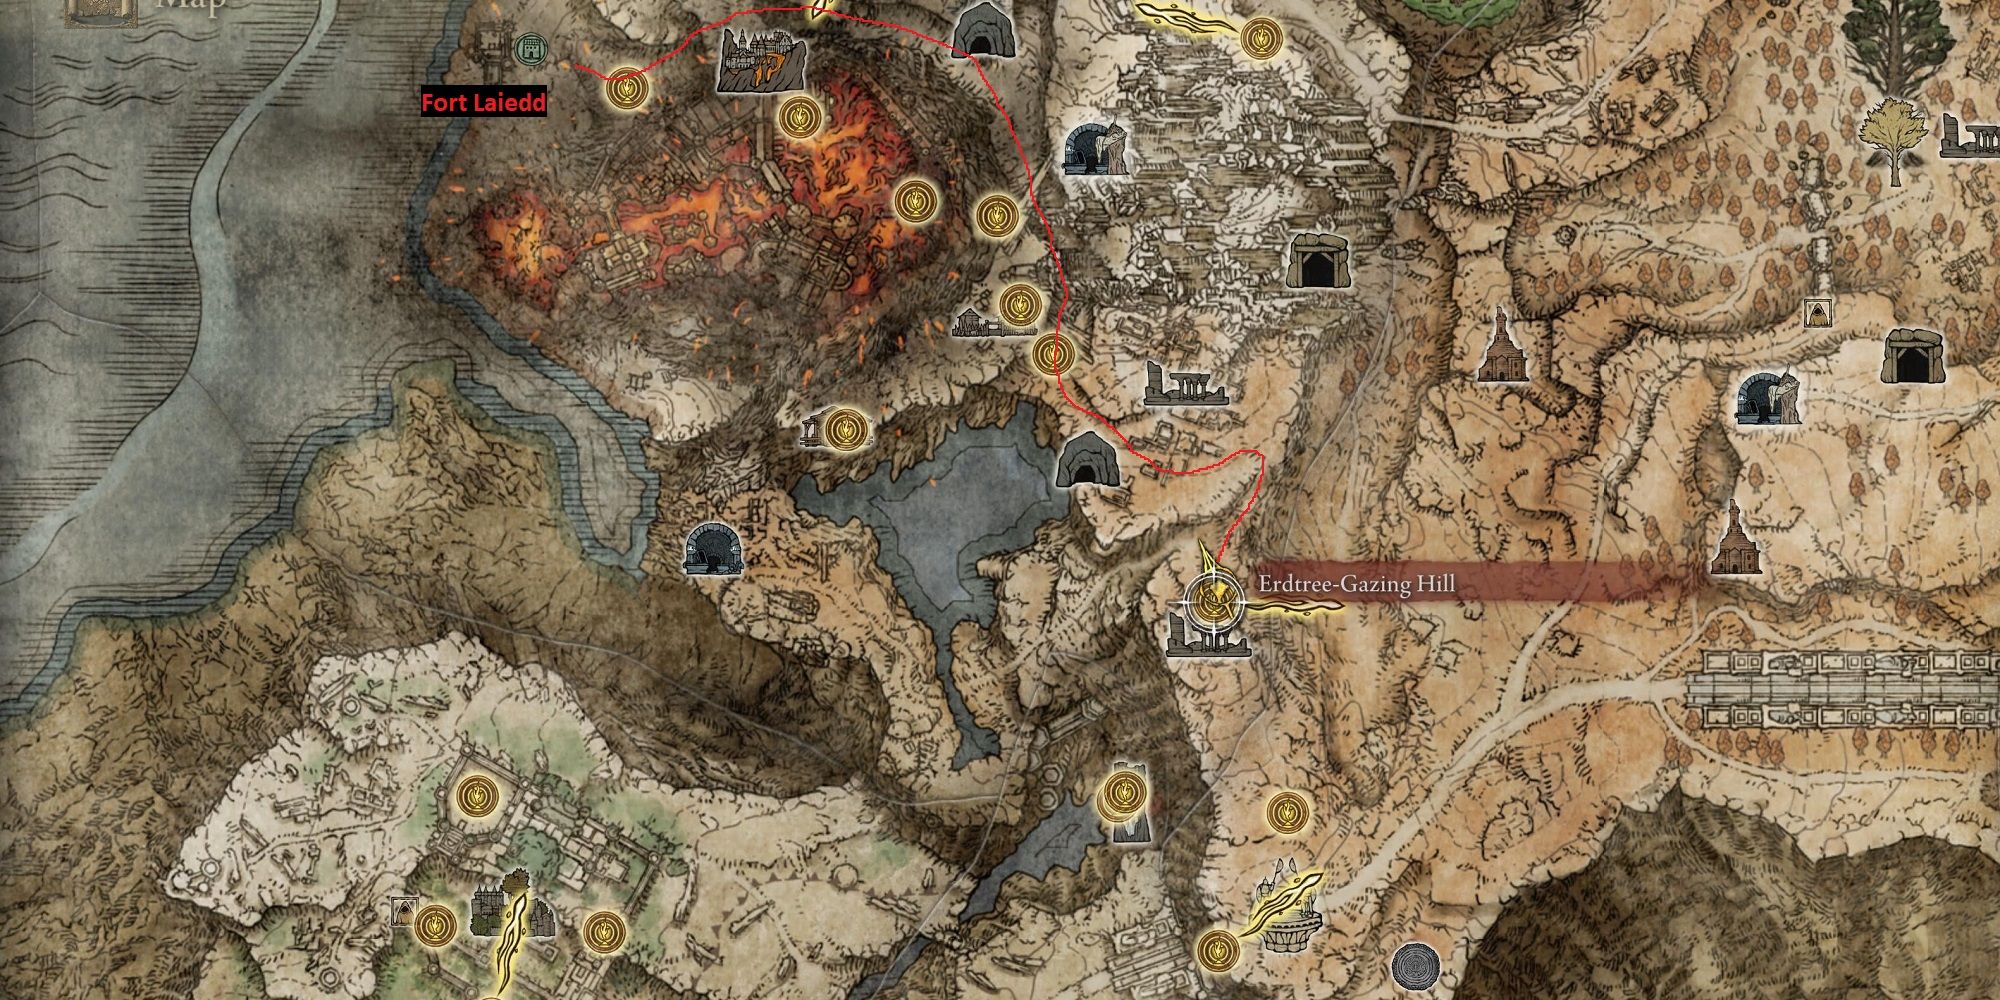
- To start, you should have reached the Altus Plateau before continuing to Mount Gelmir.
- From Erdtree-Gizzing Hill Grace location, looking north.
- You’ll discover a thin path running up the hill, and one of the candlelight statues pointing upward.
- Follow the road to Wyndham Ruins.
- Here, you’ll encounter one of the infamous Tibia Mariners, who will summon all kinds of zombies, including giants.
- Head east, around the Wyndham ruins, and follow the path north along the west side of the ruins. I shot a position on the blessing of the Sittwater River.
- From Sittwater River The site of grace, your way is direct. Follow the river north, avoiding the zombies along the way.
- When you hit what seems to be a crossroads in Seethewater Cave, veer left Continue on the way west.
- Watch out for the jets of steam from the river at this point in the journey.
- Ride until you discover Leed Castle from afar.
- Be sure to grab a Seethewater Terminus site of grace On your left as you leave the river.
RELATED: Elden Ring: Best Craft Items
outside the fort
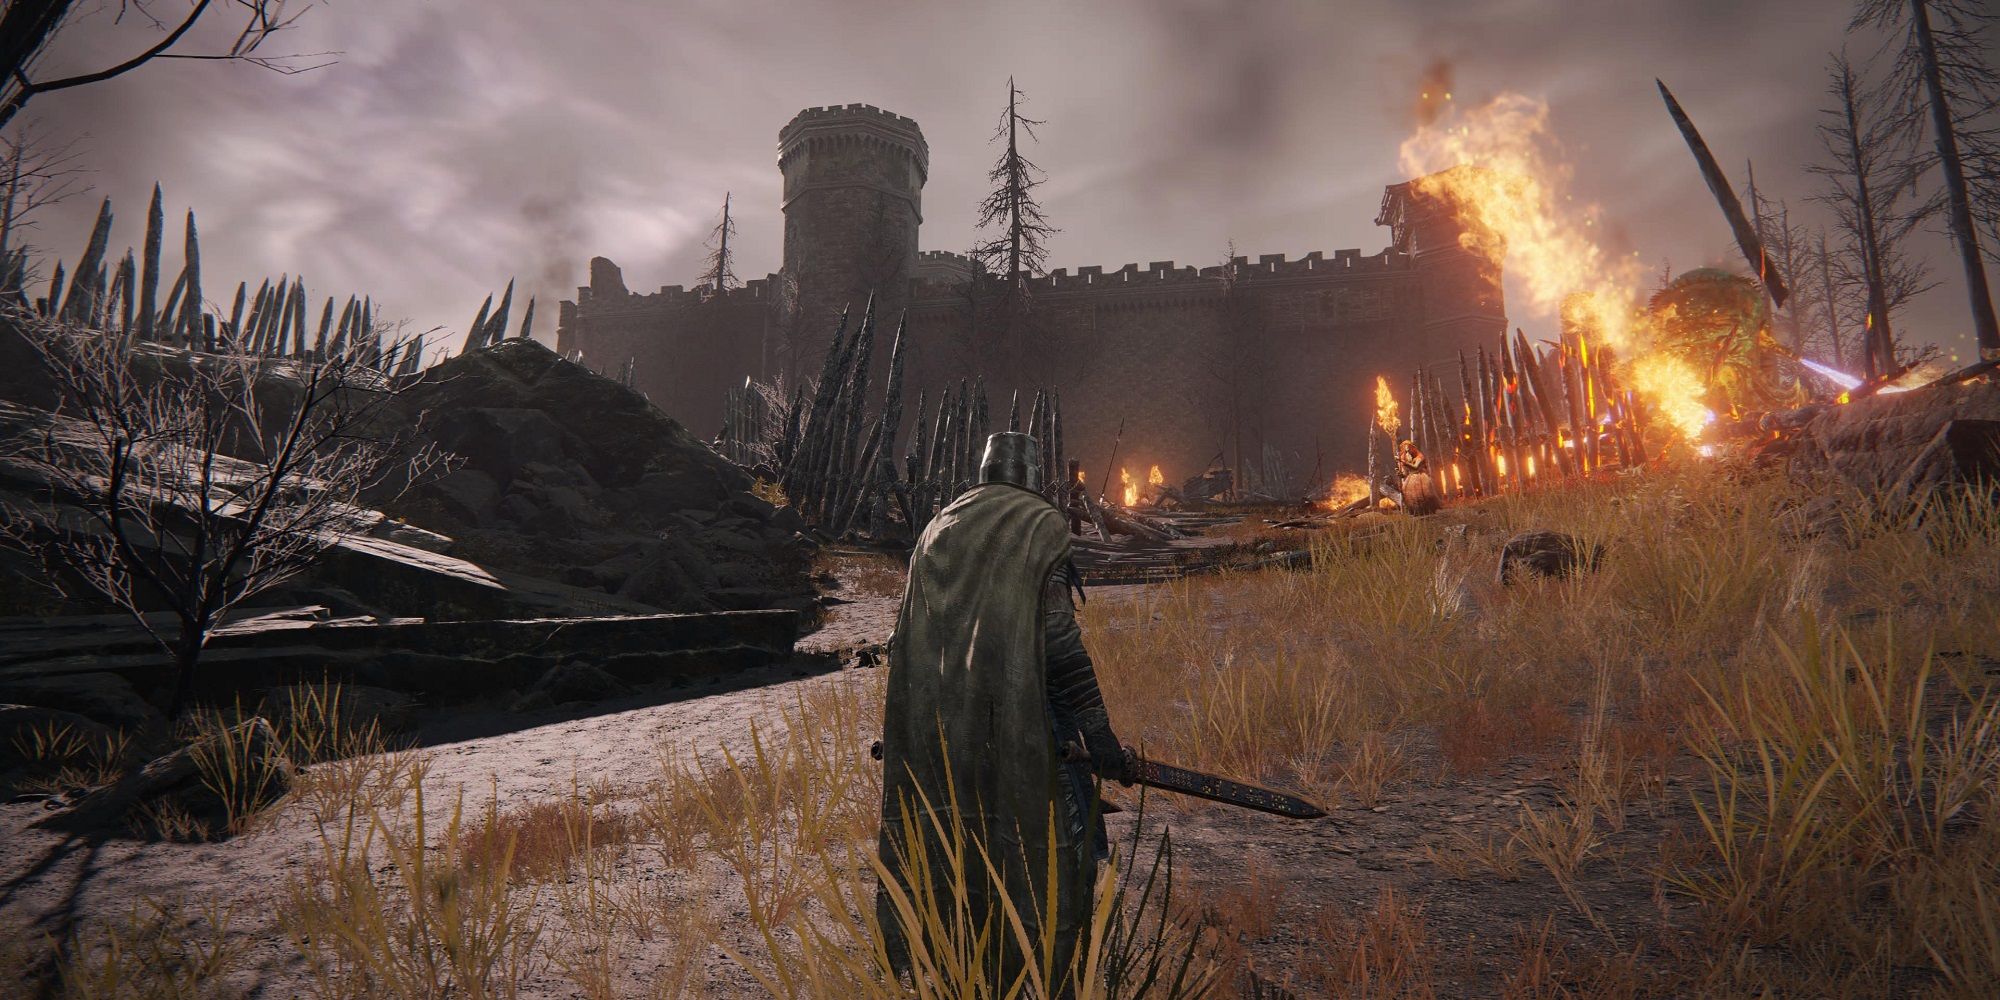
Outside the fort, you will encounter many enemies, fire thorn magic And the chariots of fire They make up the bulk of the occupying force, with a few fire monks scattered among them. You’ll also encounter a few of Leyndell’s surviving soldiers, but they were surreptitiously murdered by the Thorn-Fire Witch and Fire Monks.
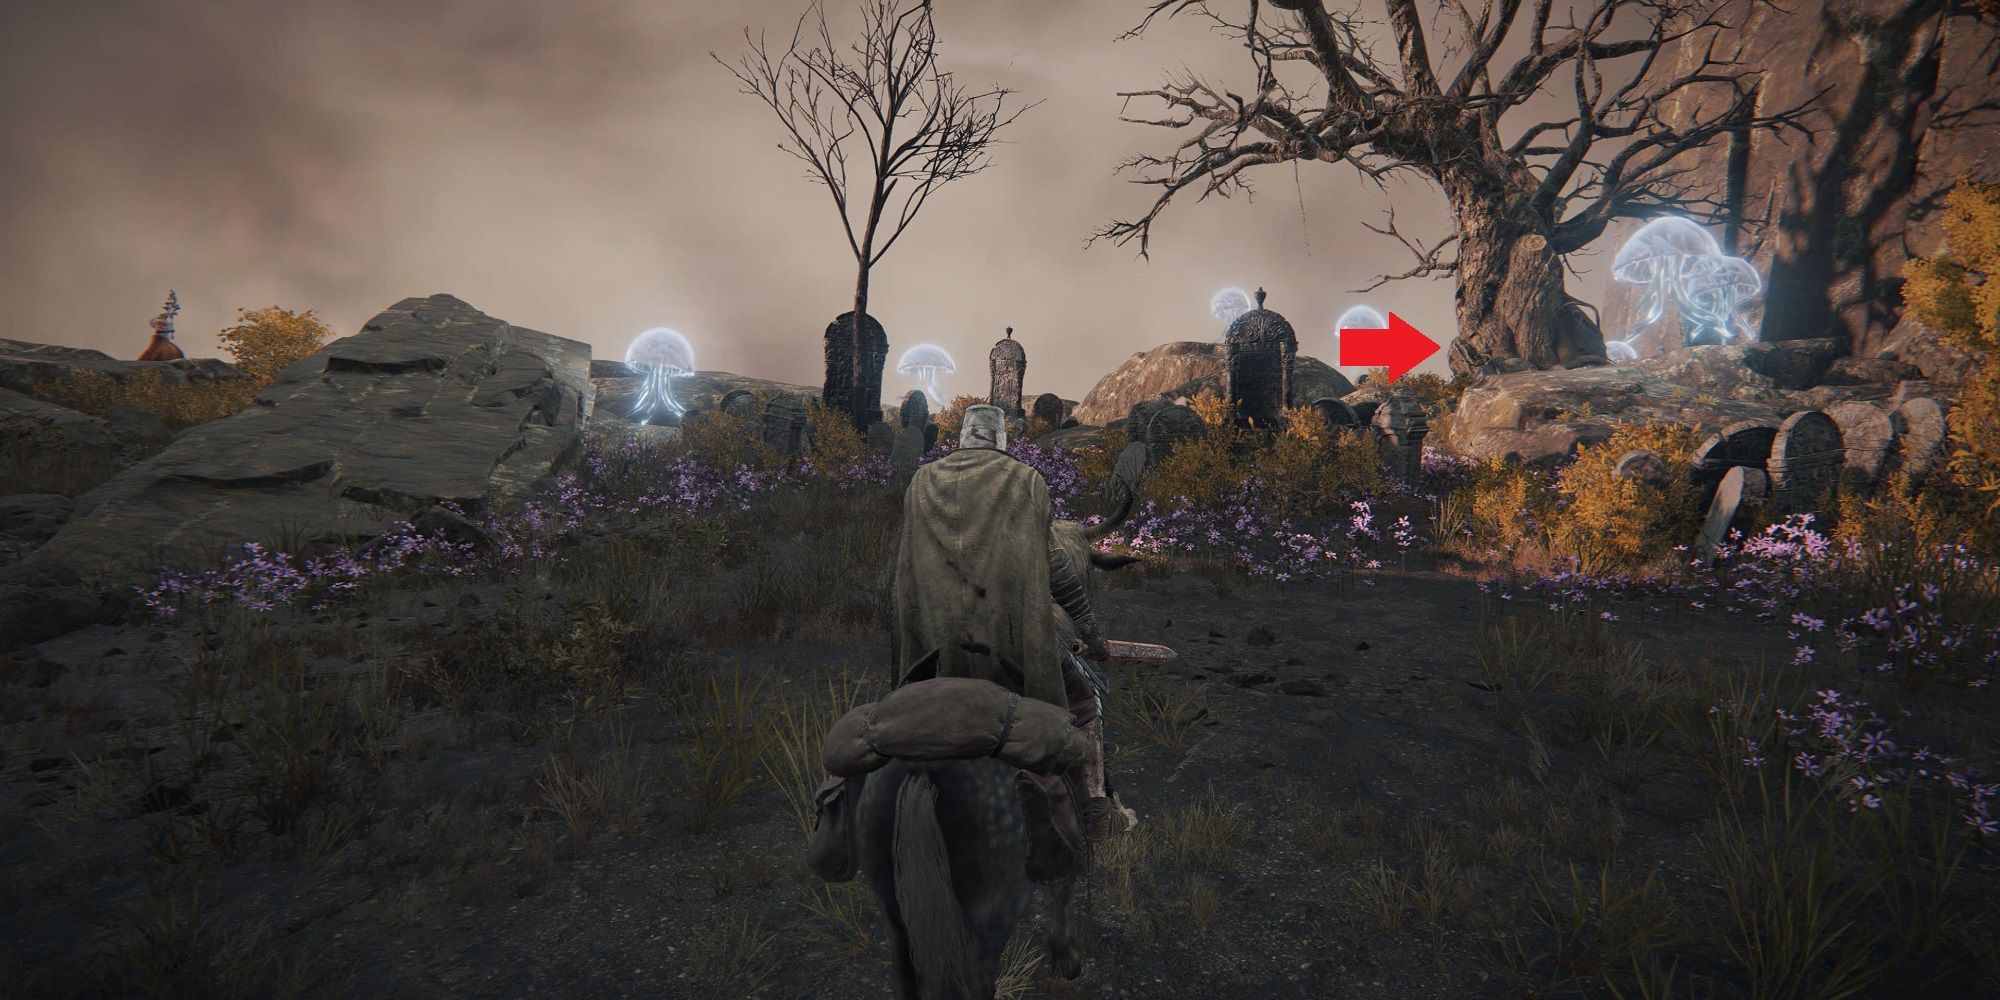
The outside of the fort doesn’t contain much valuable loot, except for one spot. Looking at the castle, you will discover a knotted tree far to the right, surrounded by jellyfish soul. Behind this tree, you will discover a Stonesword key.
Otherwise, head to the main entrance to the castle. Most of the other enemies you can simply ride or sneak up on, but you’ll want to deal with the lonely fire monk Camp by the fire pit at the entrance. Once that’s dealt with, head to the walkway entrance and into Fort Laiedd and the tough showdown awaits you.
Related: Elden Ring: Tombsward Catacombs Walkthrough
Defiant Approach: Fire Applicant

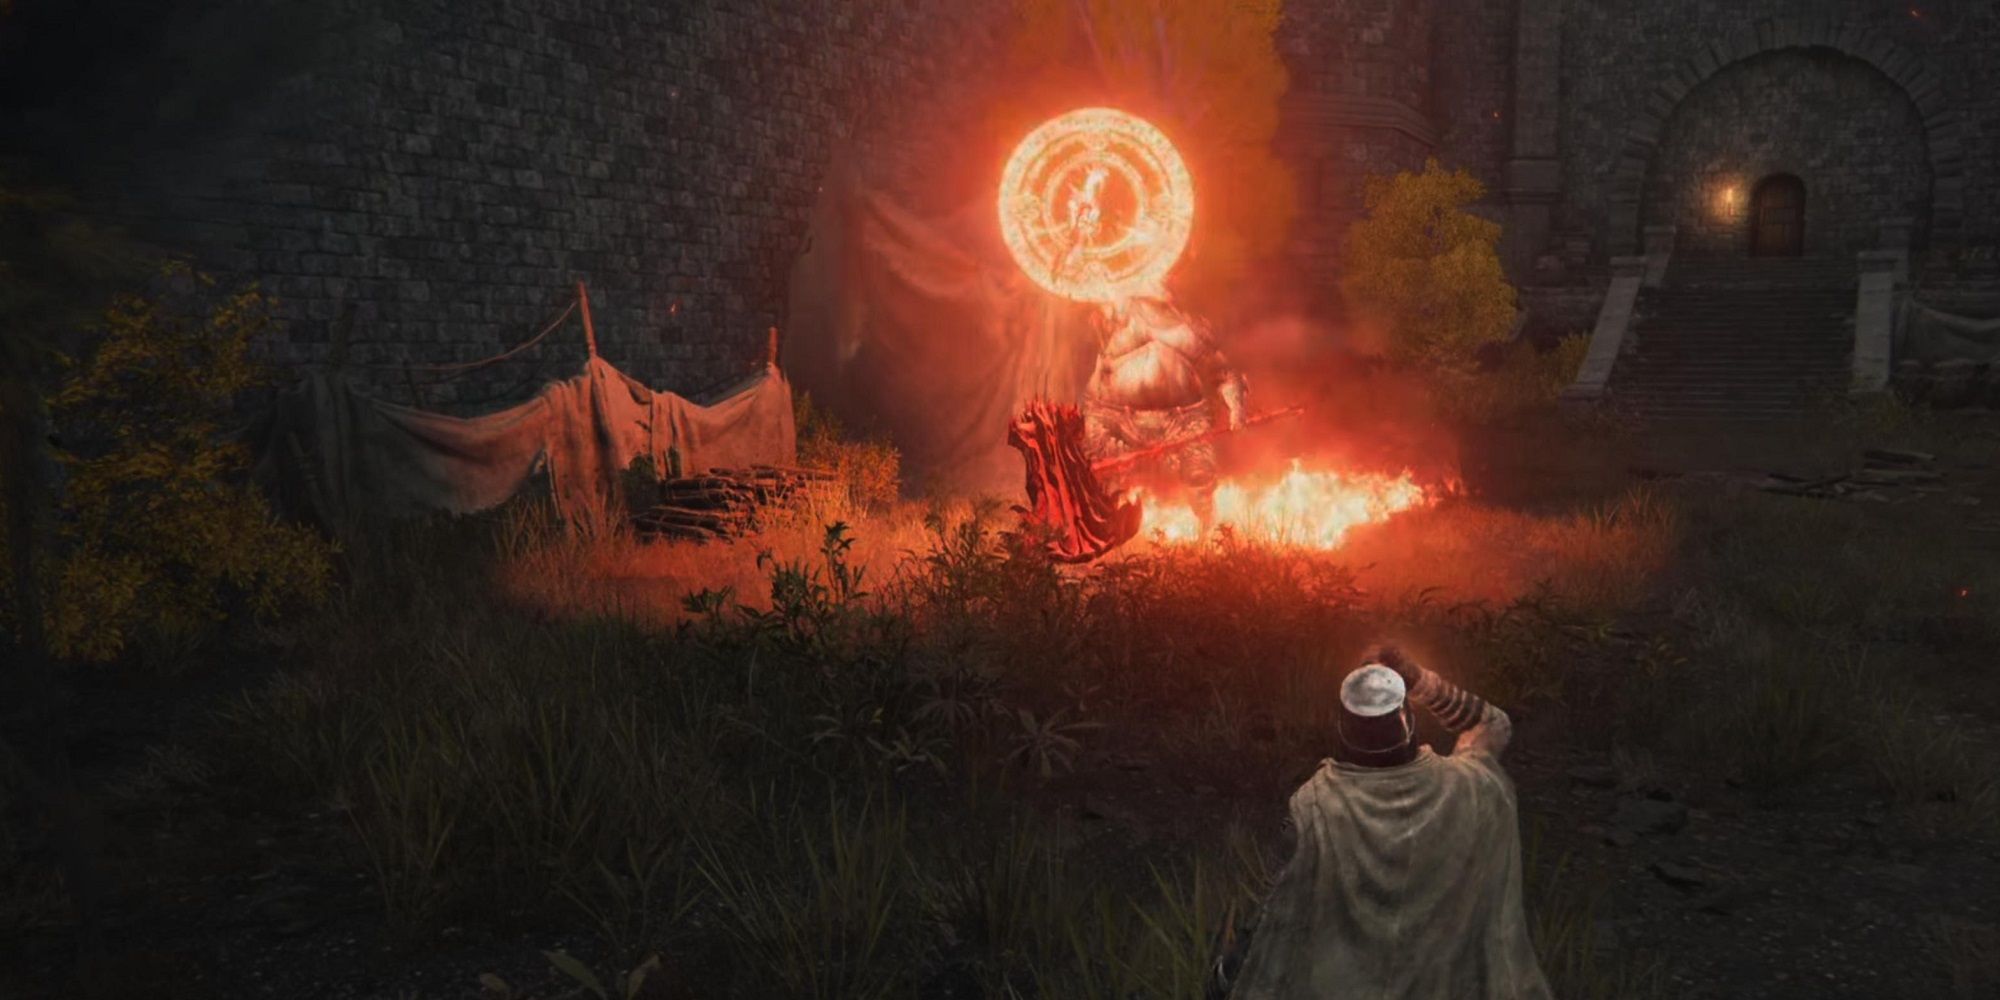
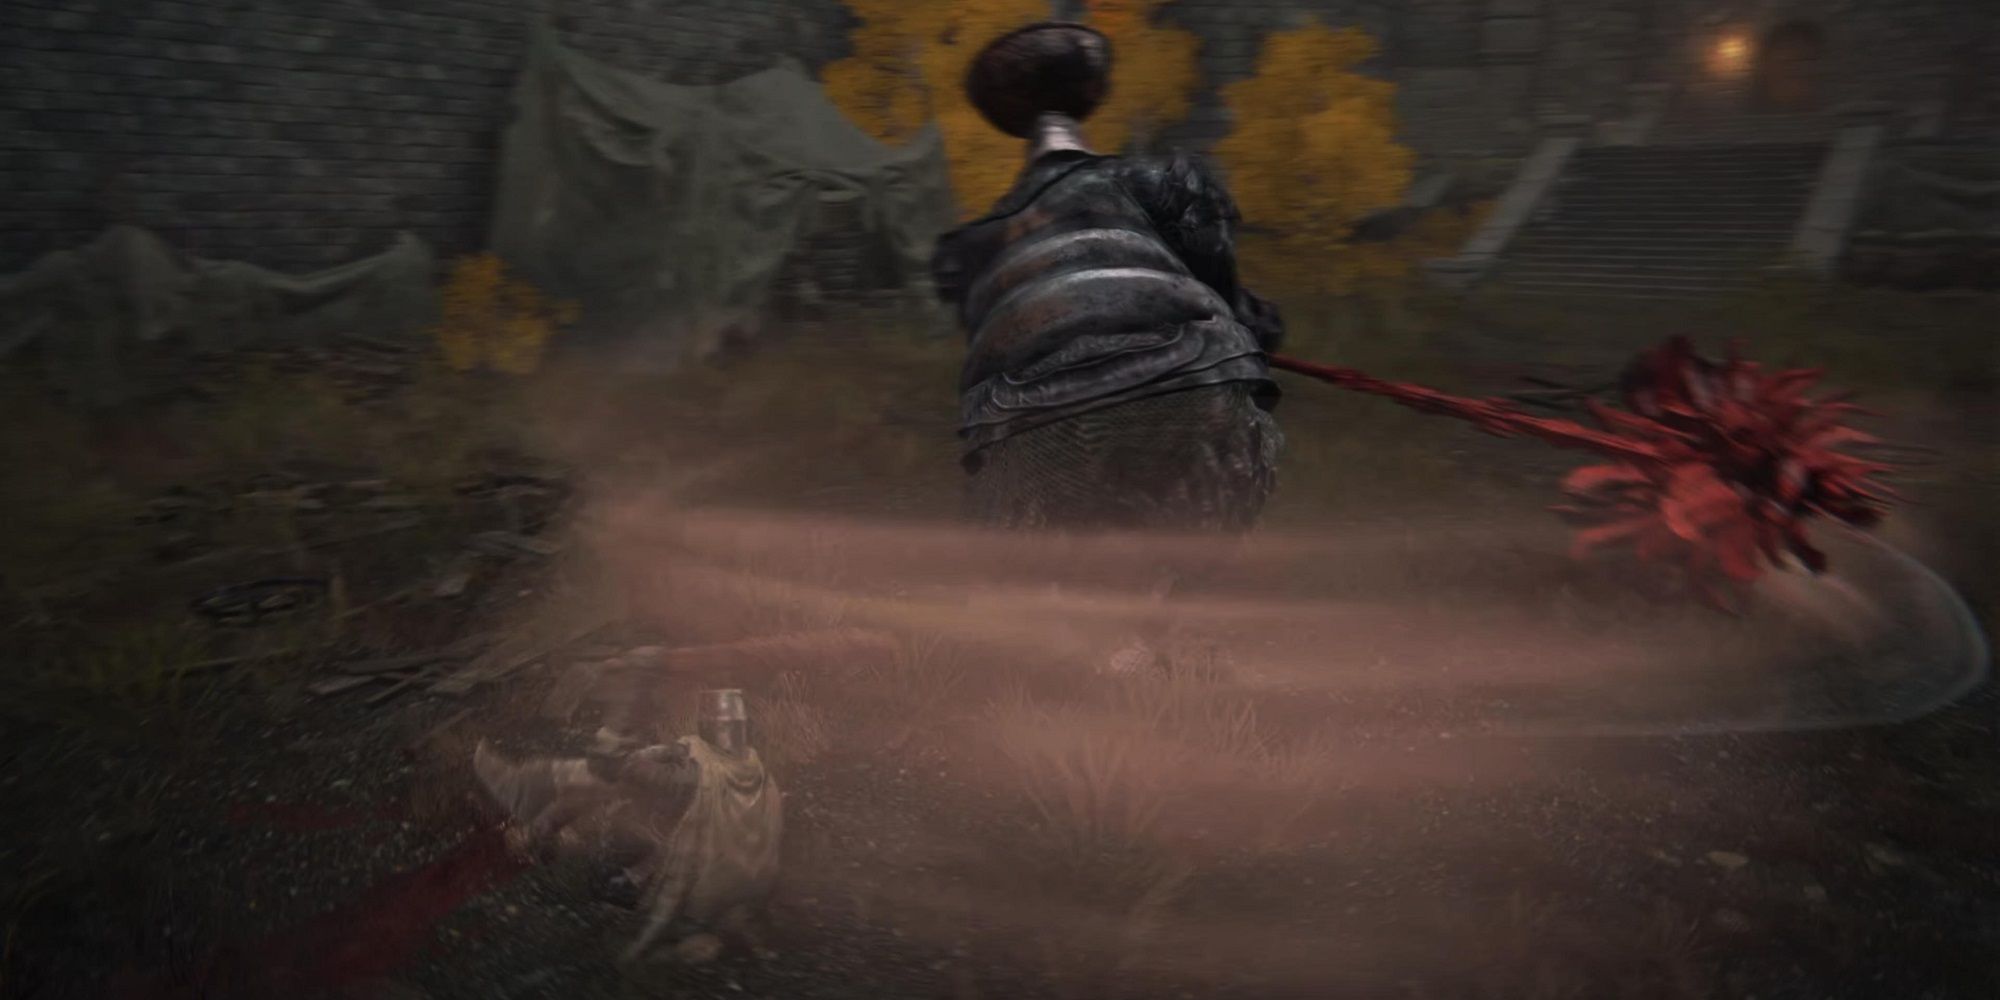
The interior of the castle consists of a wide open courtyard with only one enemy waiting for you: a fire hammer. If you have never encountered this enemy before, it is one of the most challenging enemies you will encounter in the game, and it demands the utmost respect from you – lest you find yourself killed prematurely.
flame burst
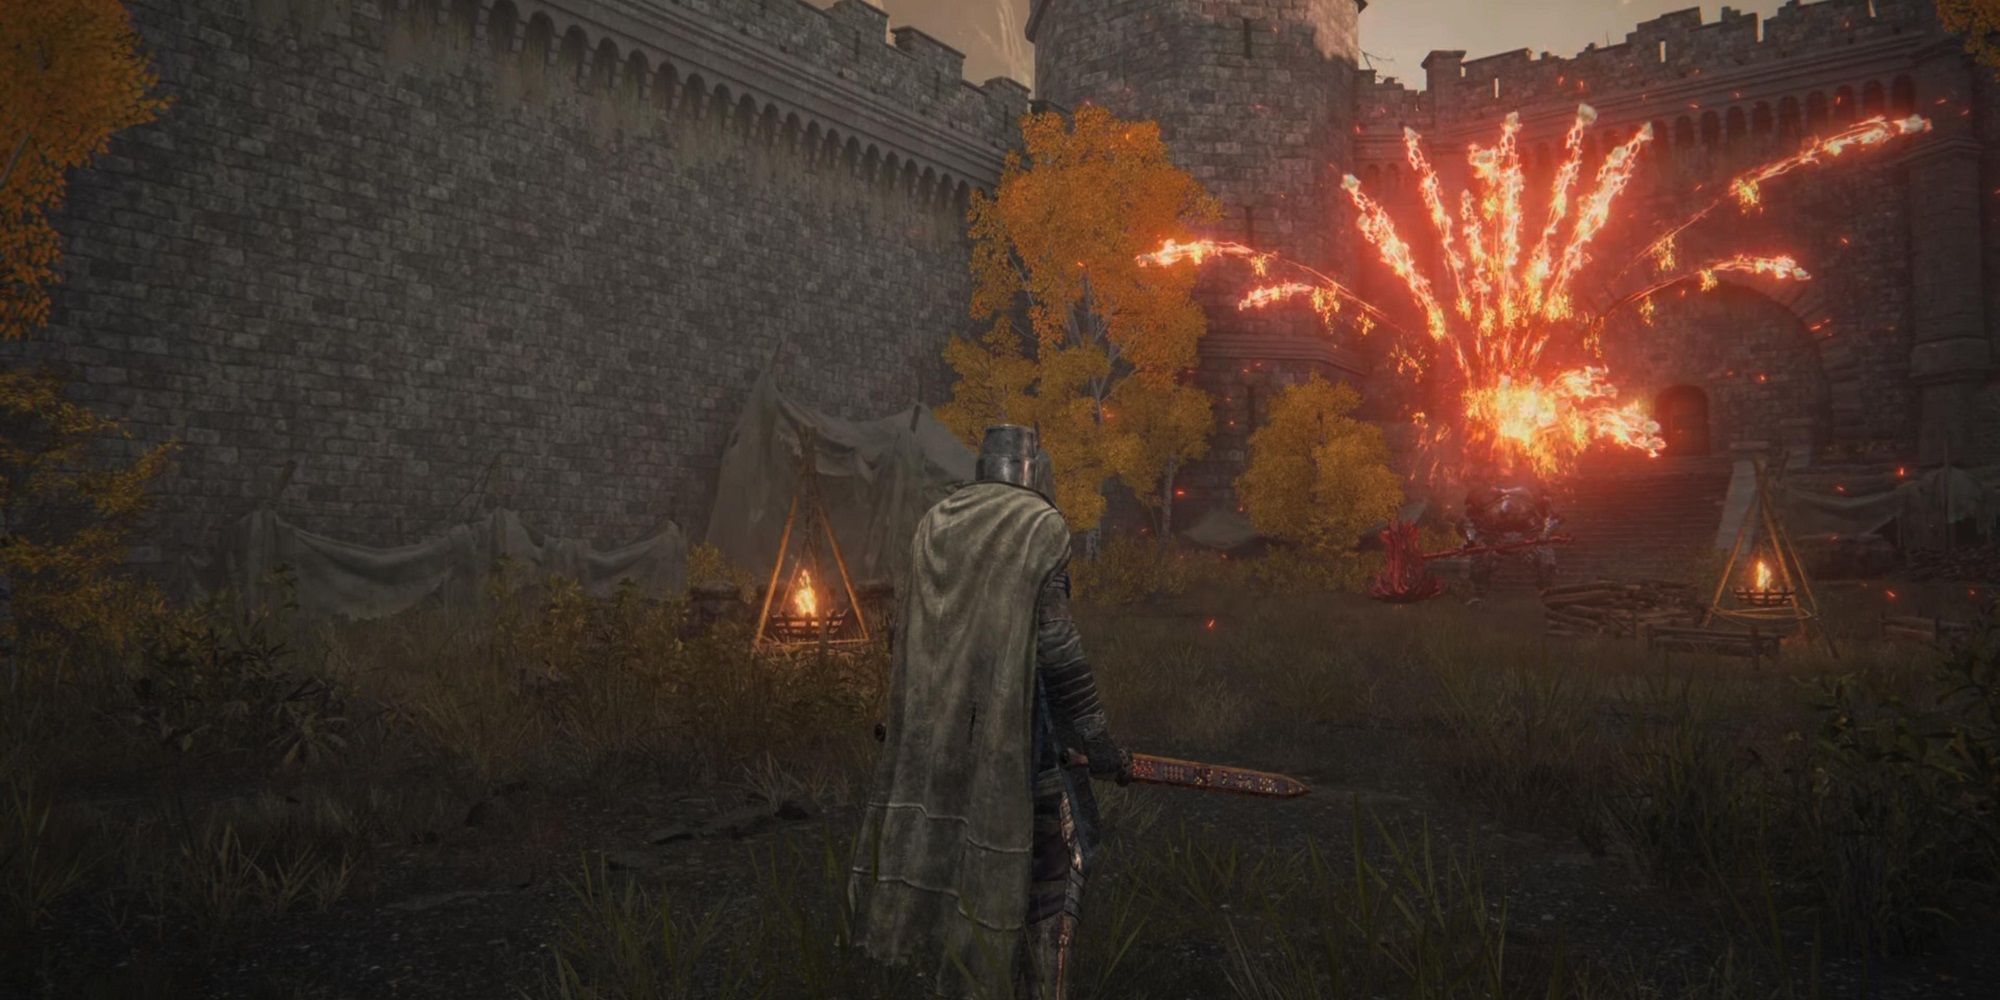
Once you get inside the fortress, and Fire Prelate notices you, it will do so at once erupting in flames. The bowl on his head will start shooting everywhere, and for a short time this will continue to fight. It’s less likely to hit you when you’re nearby, but the point is more Catch you in the medium term. This is meant to keep you close, as Fire Prelate can do the most damage.
fireball
Periodically, when you put enough distance between you (it will likely heal), Fire Prelate will raise his right hand, summon a fireball and toss it in your direction. This fades once it hits the ground and is easy to avoid.
Basic Hammer Attacks
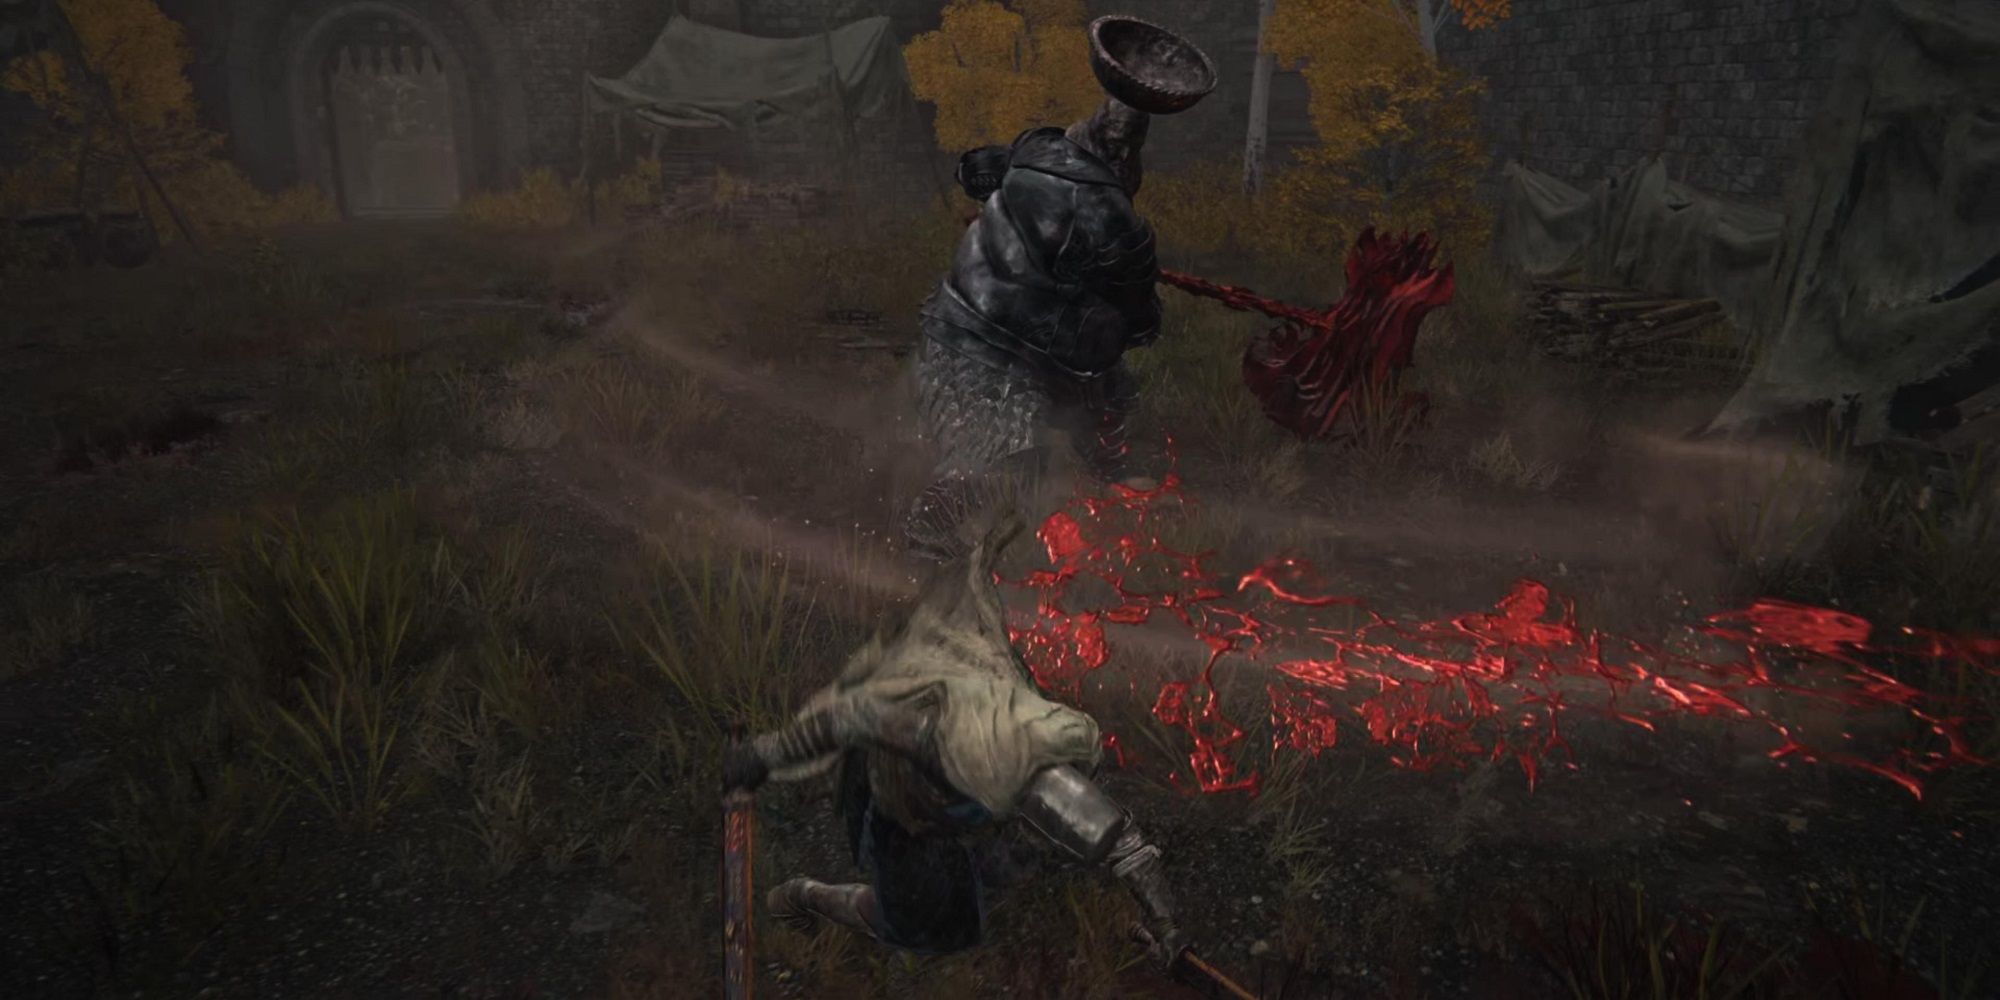
This giant hammer is the weapon that Fire Prelate uses, and it can do a lot of damage. Many of his attacks for her Follow the moves, so when you avoid a swing, expect another swing to follow soon. Also, be aware that this The hammer has an amazing rangeso be sure to back off to a safe distance when you need to.
It mixes in a few different basic attacks to watch out for. Sometimes, it’s a simple hit. Other times, the swing is fast upward. Sometimes it passes to the right, then back again, sometimes it swings from the right, turns around, and swings from the right again.
These attacks are fairly straightforward, but due to the nature of his massive weapon, each hit can result in a certain doom. Always try to dodge his normal attacks, as this gives you the best chance of avoiding taking damage and counterattack before he recovers.
Leap and peace
The fire cylinder would jump into the air and bounce back to the ground, emitting an appropriately sized area of impact. try to Dodge in Fire Prelate He also criticizes. he is vulnerable After this attack for a few moments, and by turning against it, you could end up behind it, perfect for some powerful attacks.
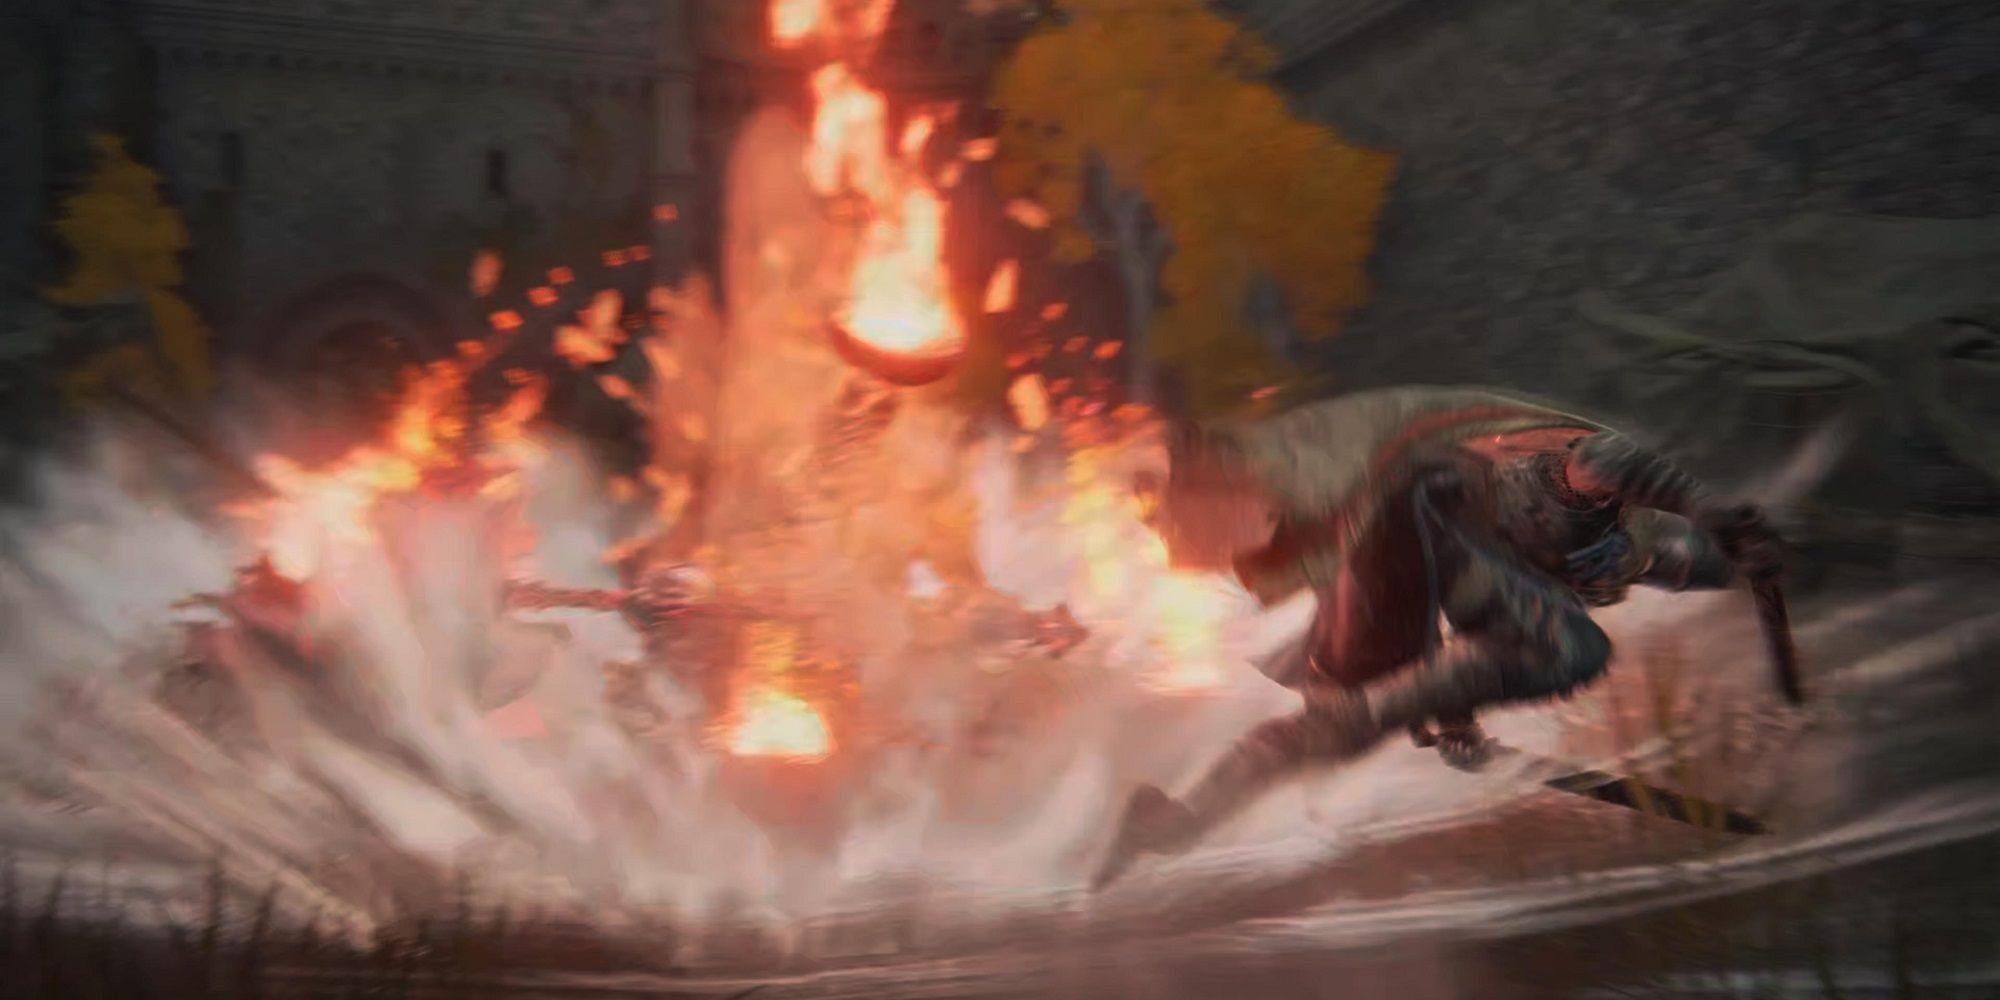
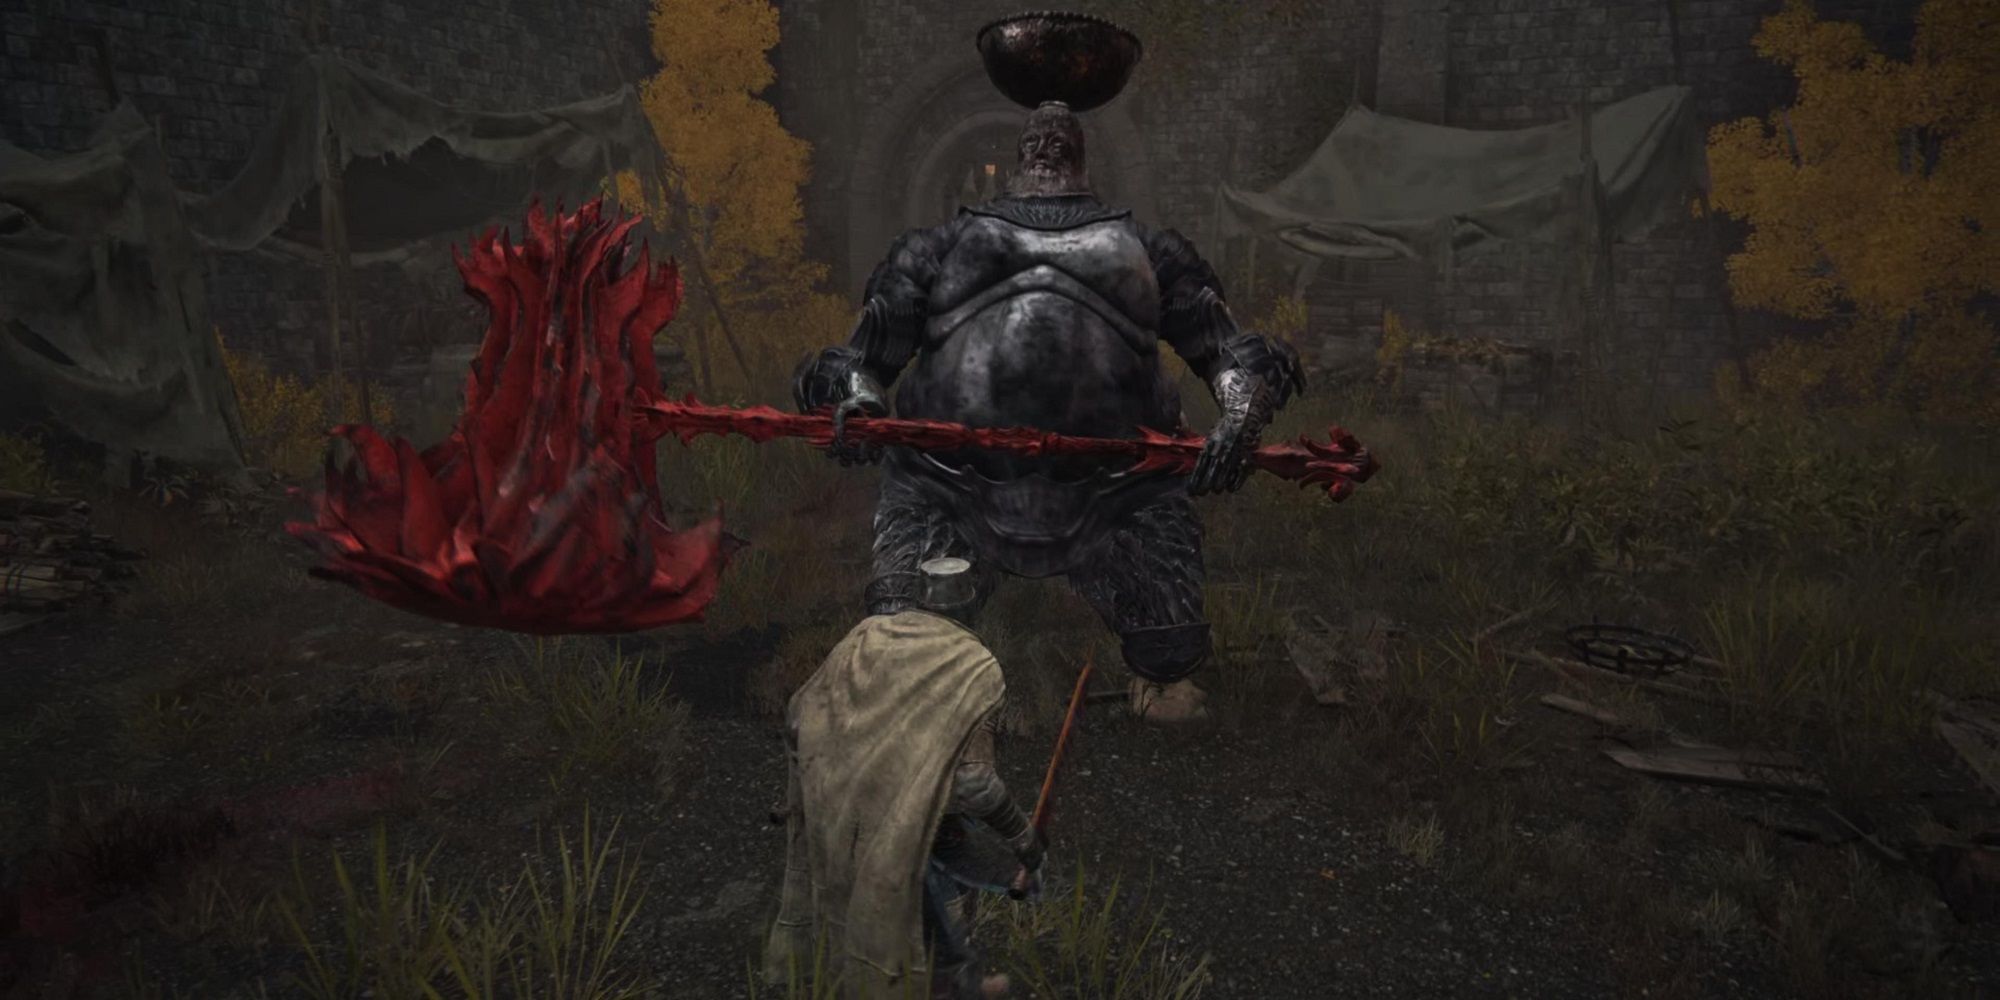
Bishop’s charge
Maybe Prelate’s fire Deadliest attack, he will hold his hammer straight in front of him for a moment before swinging down, like a hammer looking for a nail. Then he will attack you, shooting in front of him. Then it will follow this up with a file swing upwardThen he will hit his gavel in the devastating blow. If you can avoid all of those moves, he’ll be weak after that last slam, but you might be better off holding back to heal. Just be prepared to follow along with a fireball.
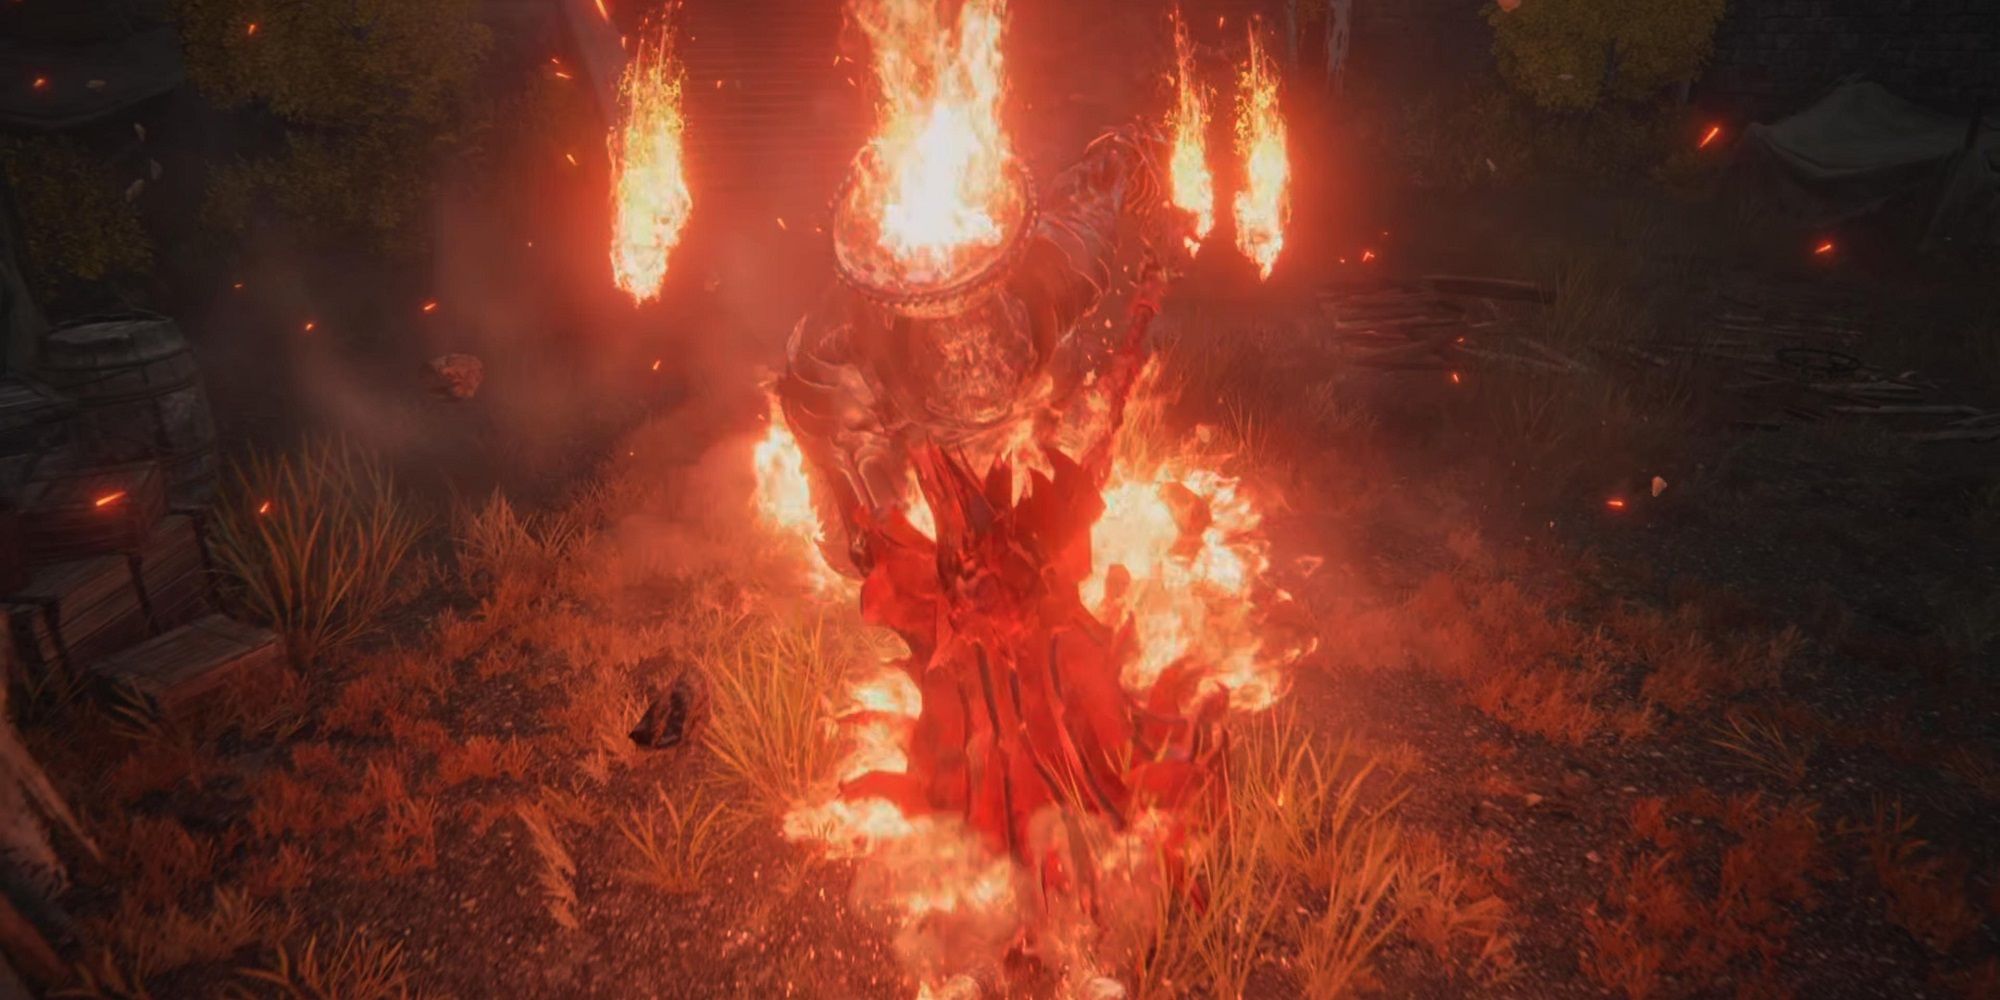
Spin Hammer Attack
The Fire Prelate pulls his weapon to his right (your left), charges his swing, and unleashes a powerful spinning attack. he is It rotates about three times In quick succession, making every move difficult to dodge. If you can recognize this move early on, your best bet is to pull out of its scope. If you get stuck in one of his swings, dodge quickly to avoid a follow-up. After the third turn, his hammer digs into the dirt, and he is vulnerable to a follow-up attack.
head crush
This movement comes quickly, which easily surprises you. fire hammer He raises his head back And he hits her on the ground in front of him. It doesn’t do much damage, but it can quickly dampen you before any move it tries next. When you realize this, try to dodge towards him so that you end up a little behind him, and are able to make two attacks before he recovers.
Upon defeat, he will drop his signature weapon, Prelate’s Inferno Crozier. A very heavy, but powerful weapon – as you now know.
RELATED: Elden Ring: All Sword Keys Saturated Locations
Prelate’s Crozier’s Inferno

This hammer is classified as huge weaponIt weighs 23.5 lbs and requires a massive amount of weight 45 (!) The power to exercise it effectively. If you have the strength to use this weapon, it can be devastating in your hands. It has a fairly slow range of motion, typical of most massive weapons, but what it lacks in speed and dexterity it more than makes up for in raw power. Heavy Attack uses the upward swinging action that Fire Prelate used against you in battle, and when charging, the action will propel most normal enemies high into the air.
hammer weapon skill, Bishop’s charge, is the real show stop. When activated, the hammer explodes in flames as you slam it into the ground in front of you and move forward, leaving a trail of flames in your wake. You can then Attack extension By holding L2, extending the charge until you release the button. At the end of charging, you will swing the hammer up. He. She It costs 7 FP to start The first slam, then 7 additional FP periodically to extend the fee.
This weapon art can be invaluable when you’re moving through slow terrain, like Poison or Scarlet Rot, because the weapon skill allows you to move quickly through the area.
Related: Elden Ring: Cliffbottom Catacombs Walkthrough
loot the castle
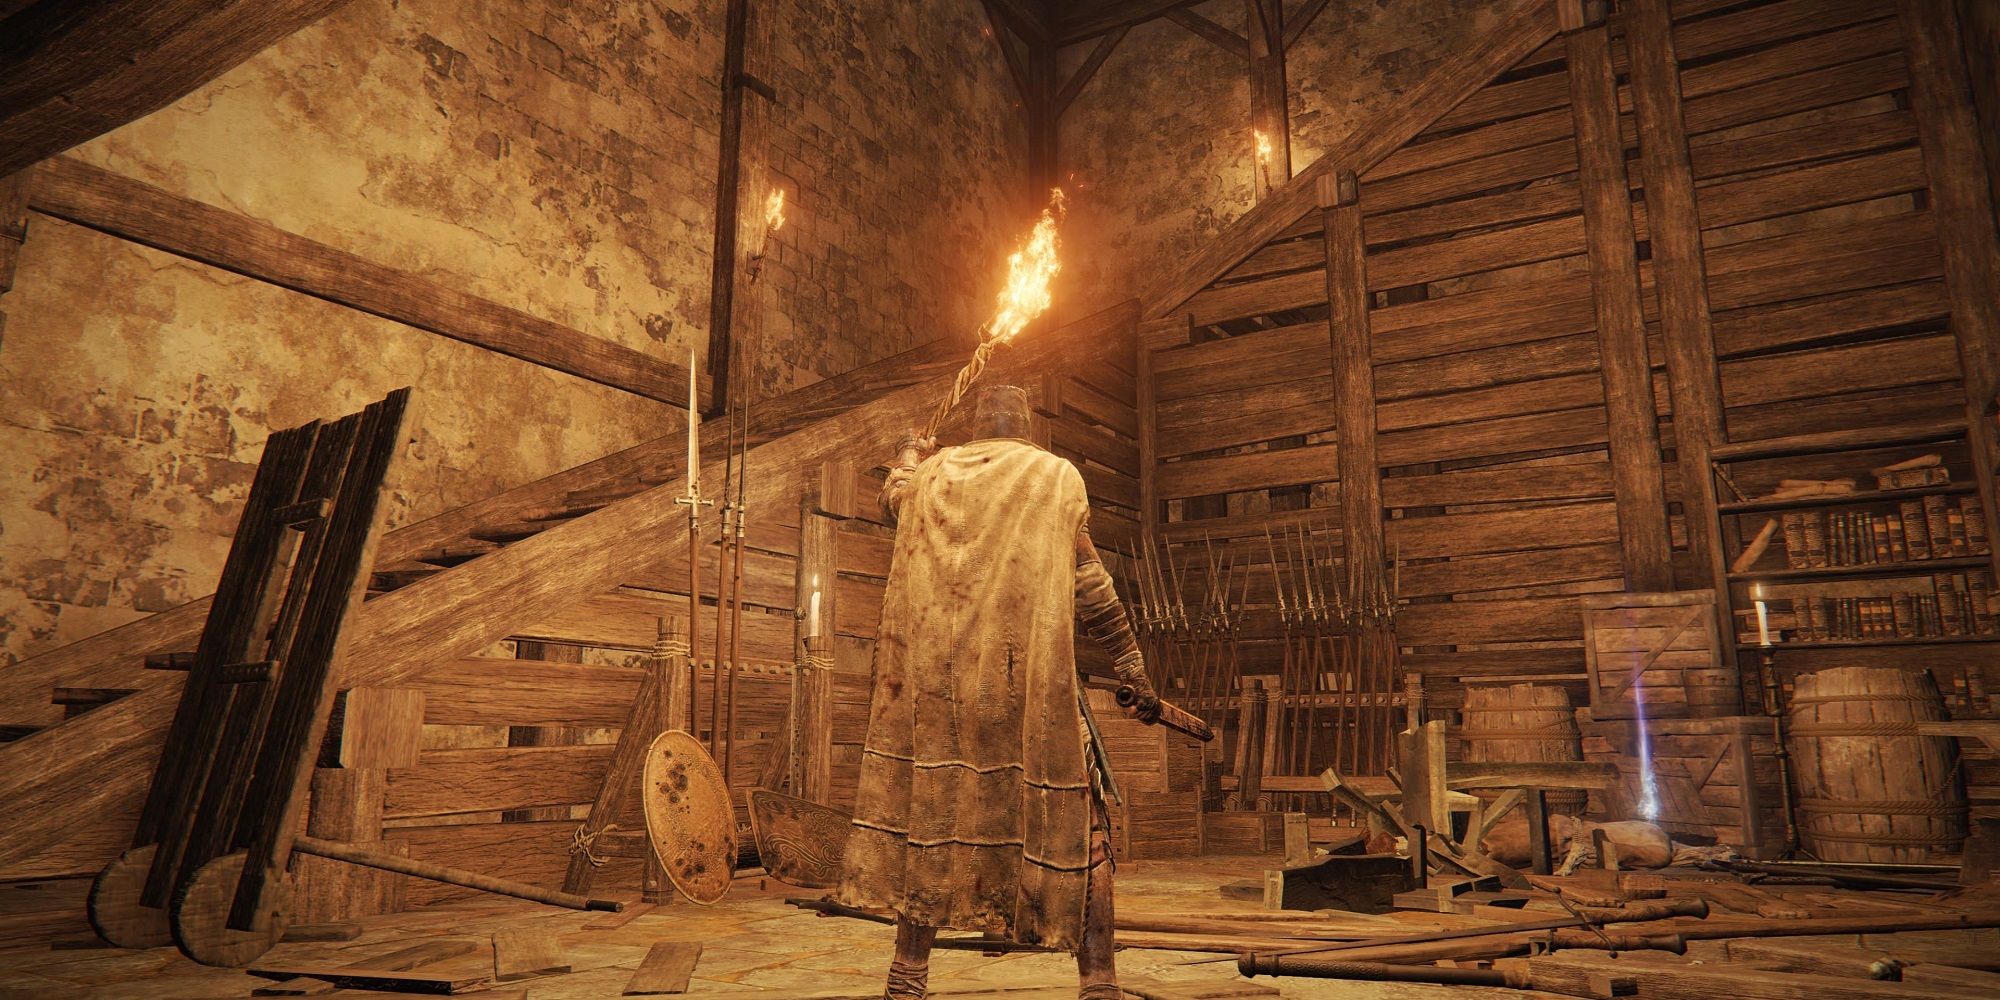
The Fire Prelate is the only enemy inside the fort, so now it’s yours. Head to the door at the back of the courtyard and into the next room. You will find a winding staircase going up, and among the tables in the basement, you will find Armorer’s Cookbook [7].
Go up the stairs, where you will find many corpses from a previous battle. loot away! In this landing, you will find three sleeping eggsOne Golden Rune [8]The chest is already open (and empty). You’ll also hear some dialogue as you walk around this small area: “Eek…! Wretched idiots…” But the source is out of reach.
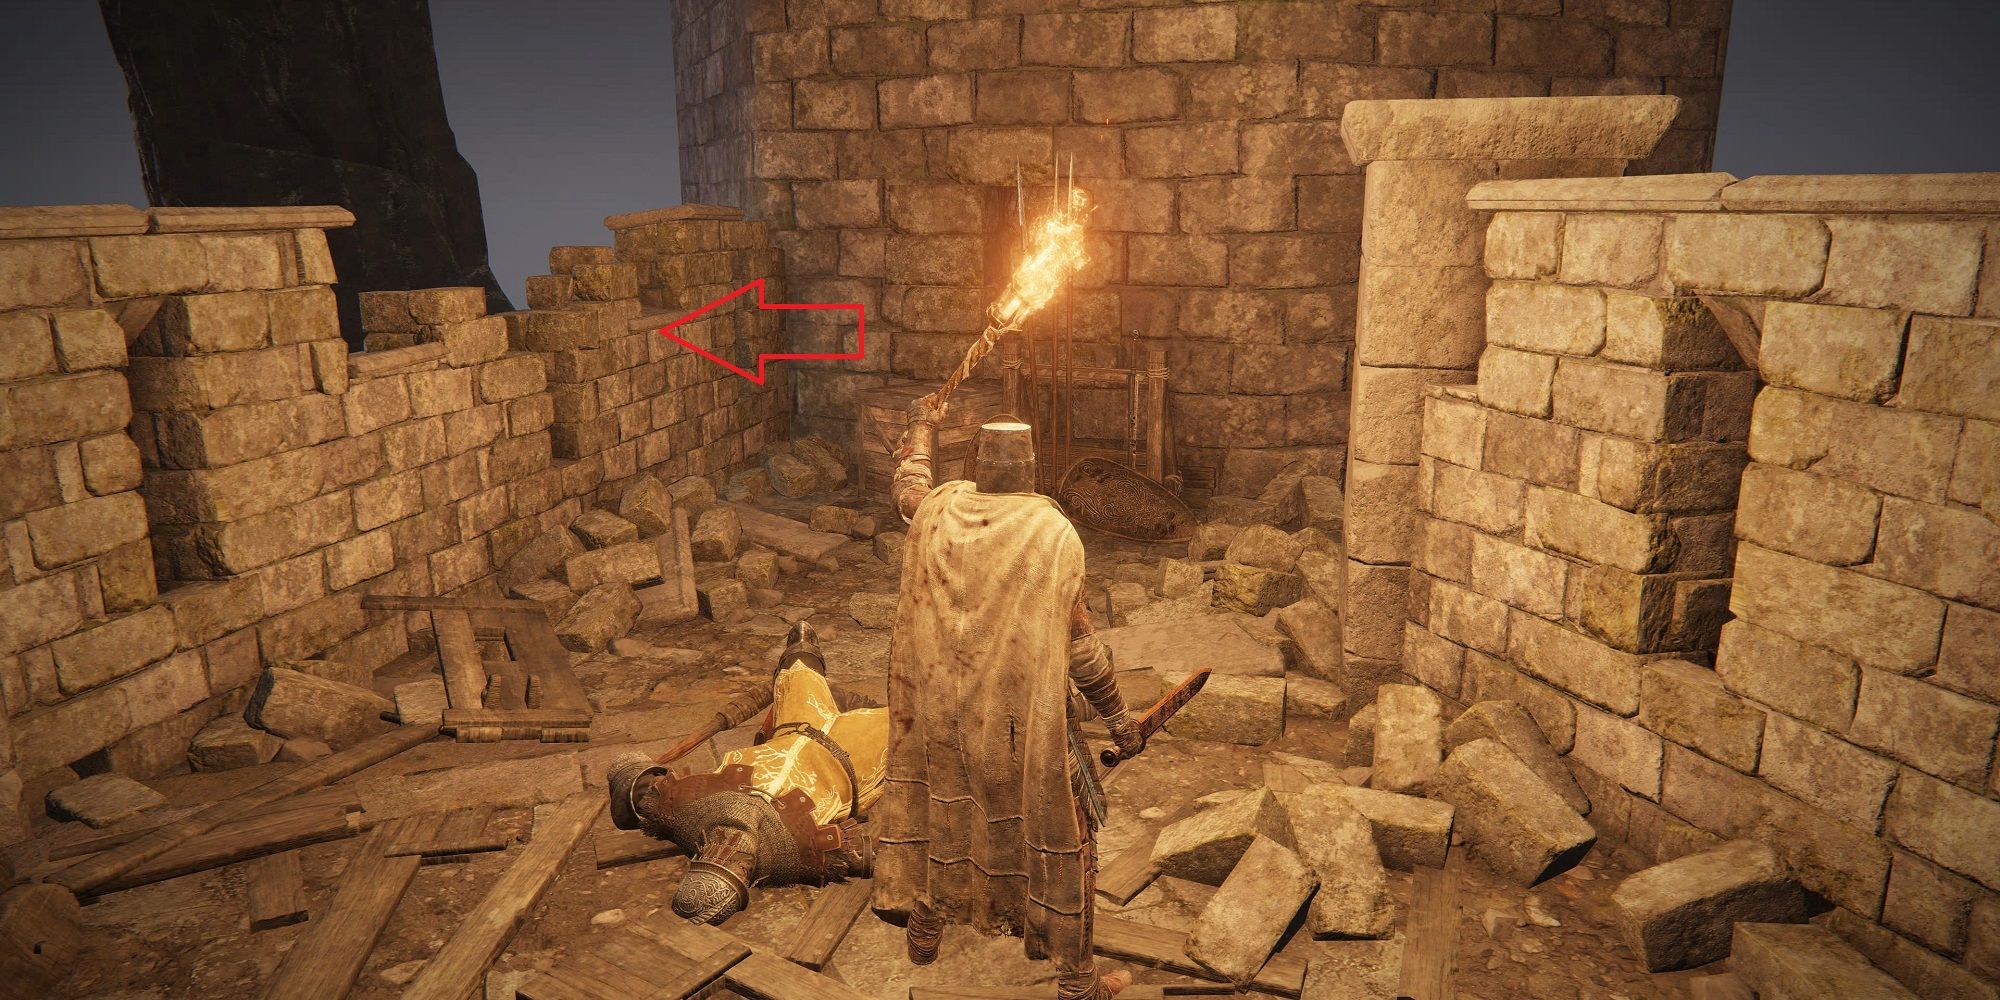
Head to the side opposite the open chest, over a high barrier. You will discover some stones stacked by a Dilapidated section of the wall. If you look over the edge, you will discover a soul on the other side. Stand over the stacked stones and jump to the wooden platform on the other side.
Item loot to discover magic fire scorpionStrong magic for some structures. give the player + 12% fire damagewhich can be a powerful boon for some spell structures or weapons that do fire damage.
This marks the end of Lied’s fortress. Beyond the fort to the south, you’ll find a lava flow, a sudden Magma Wyrm head, and then, eventually, you’ll reach the rumored Volcano Manor.
Safe trips, you spots.
Next up: Elden Ring: Carya Manor Walkthrough